When you have a hybrid setup one of the possible ways to further secure your mail environment is by using the Azure AD Application Proxy included in Azure AD Paid subscription (P1 or higher).
Azure AD Application Proxy enables you to publish in any sense any application hosted on your servers via Azure Active Directory, thus enabling you to utilize features such as Conditional Access on your legacy apps.
For this particular situation this blog is covering, the data flow will look like this:

Breakdown
In this post I will explain you how to setup the following:
- The Azure AD Application Proxy server
- A new Enterprise Application, Outlook Web App
- Constrained delegation in order to process Single-Sign On via Kerberos
- Single-Sign On for the Outlook Web App Enterprise application
- Enabling Windows Based Authentication on Exchange
Prerequisites
In order to setup the Application Proxy for OWA you will need the following:
- One (or more) Azure AD P1 or P2 license(s) : https://docs.microsoft.com/en-us/azure/active-directory/manage-apps/application-proxy-faq#what-license-is-required-to-use-azure-ad-application-proxy-
- A domain controller, an Exchange Server and a Azure AD Application Proxy server.
- And that´s it, for this purpose
Installing the Azure AD Application Proxy
The first you need to do is install the Azure App Proxy onto the server you designated as the proxy server.
In this blog I only used one server but you do have the posibility to add more to make this setup HA (highly available).
- Go to the Azure Portal via https://portal.azure.com
- Search for app proxy:
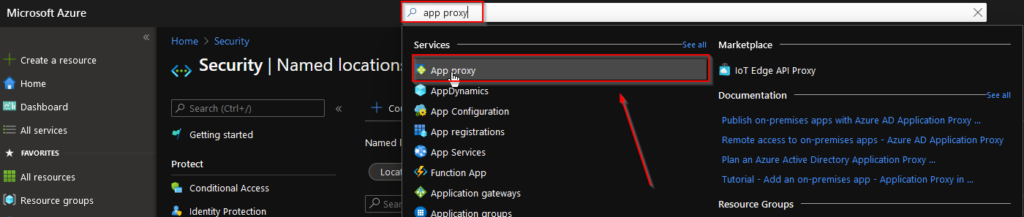
- Download the connector service:

- Install the downloaded connector on your server designated to act as App Proxy:
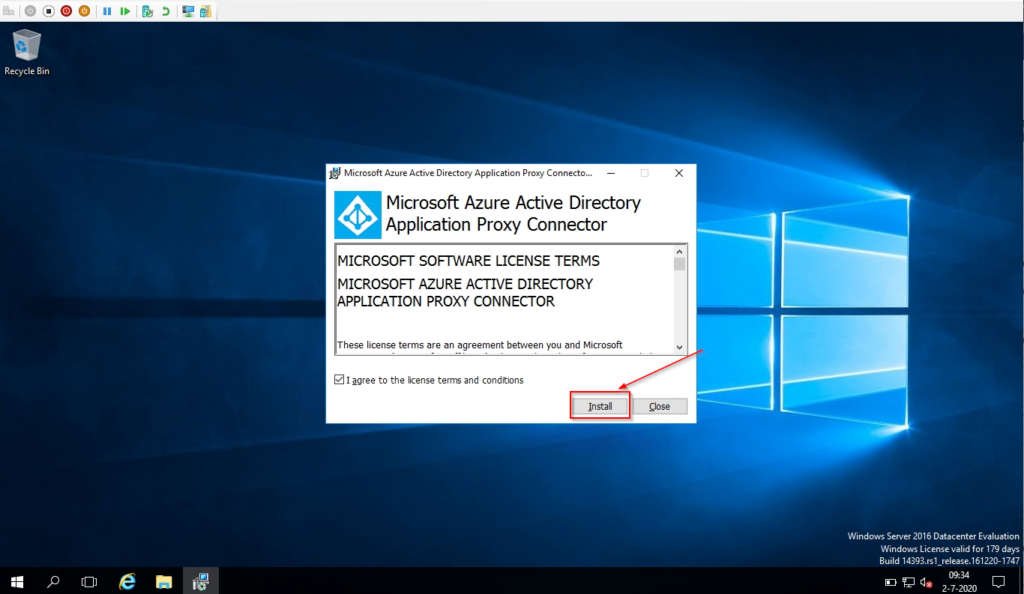
- When you successfully installed the software the server will show up in the Application Proxy console
- Click on Enable application proxy and approve the activation
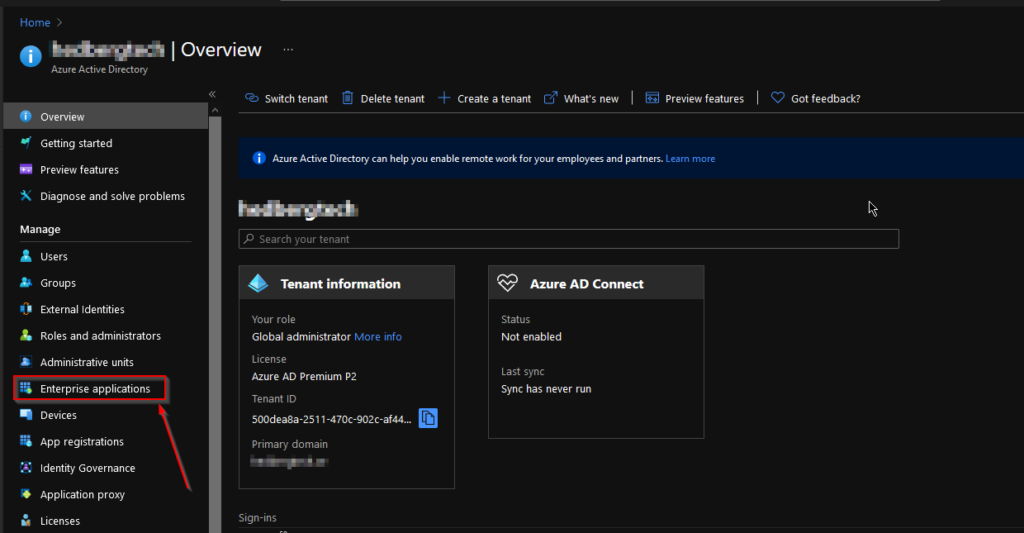
Creating the Enterprise App Outlook Web App
- In Azure Active Directory, go to the “Enterprise applications” blade:
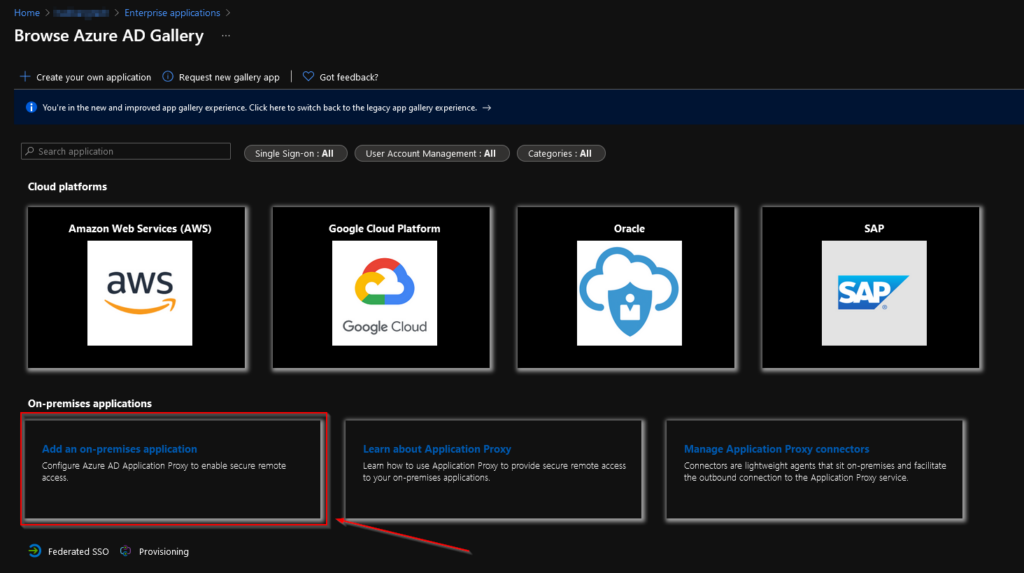
- From the “Enterprise applications” blade, select “New application”
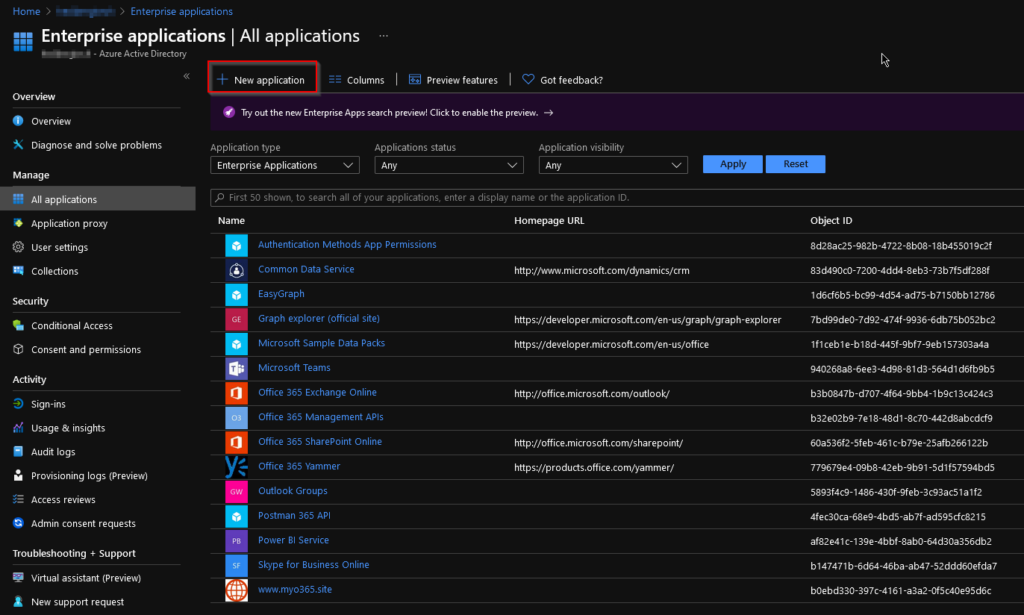
- Select “Add an on-premises application”
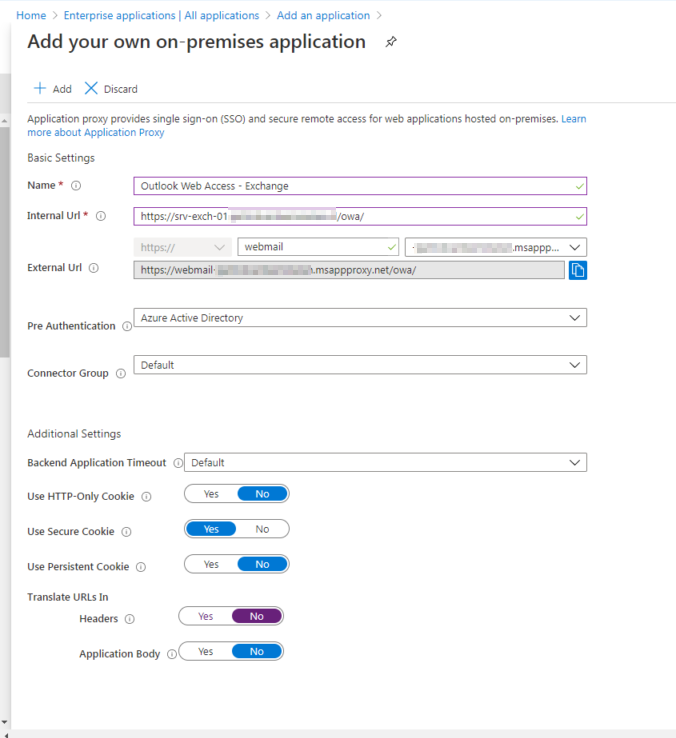
- Fill in the details of your application :
Name : The name of your application, this will also be advertised when you publish the application to My Apps.
Internal URL : Enter the internal URL for the app, I’ve entered the full Outlook Web App path because this will directly forward the proxy connections to Outlook Web App.
External URL : The URL the user is going to enter in order to reach Outlook Web App, you can either use a “default” URL or one of your own domains. In below example I’ve used the default one but you can also use your own URL. In order for that to work you will need a valid certificate for the URL you’re going to use. This could of course be a wildcard URL you own.
Pre Authentication : Where going to use Azure Active Directory in order to use all the benefits
Translate URLs In | Headers : Set this to No in order to let Outlook Web App process the authentication correctly.
- You can then start to customize your application by going to the Properties tab and adding a logo, enabling it for users and deciding whether it’s required for a user to be assigned to the application.
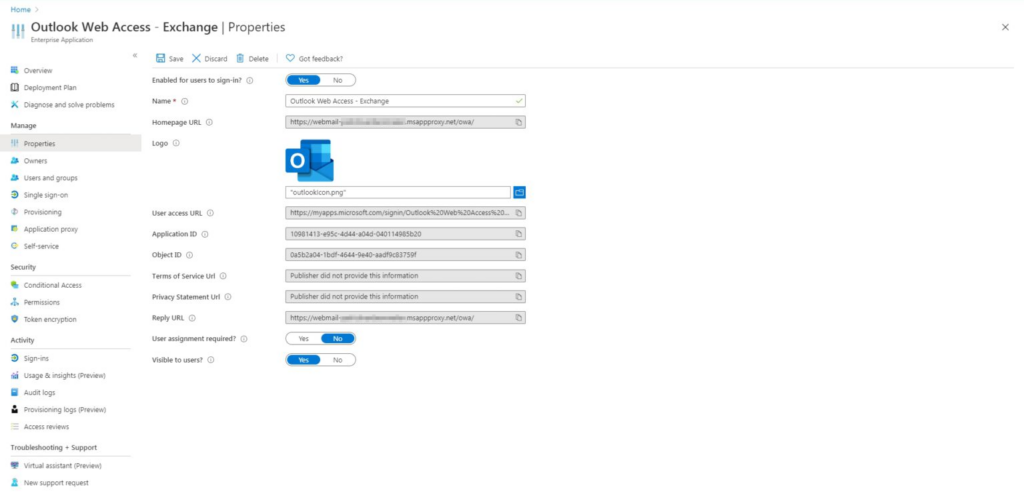
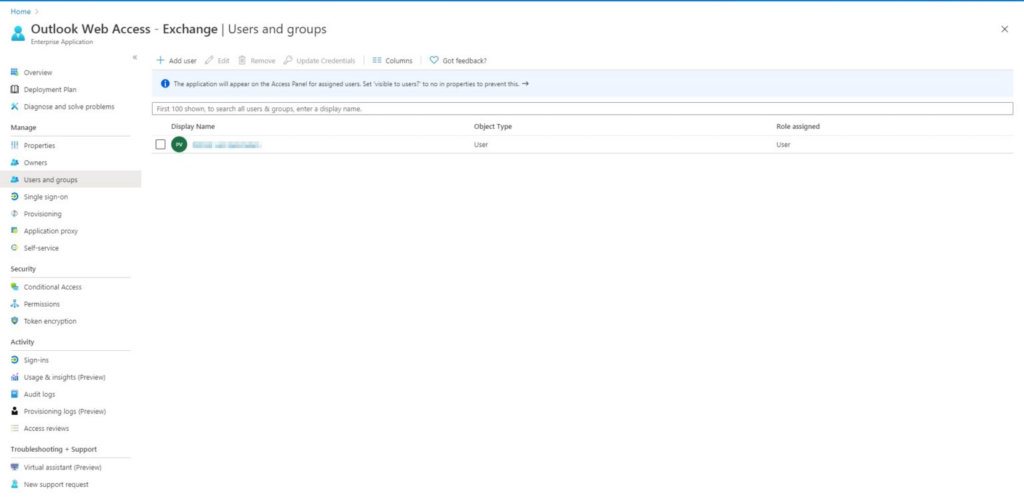
- As you can see in above screenshot the application gets it’s own URL starting with https://myapps.microsoft.com so your users can access it. If you want it to appear in My Apps then assign Users and/or Groups to the application so they will be able to access it from there.
- And don’t forget to enable the option Visible to users?
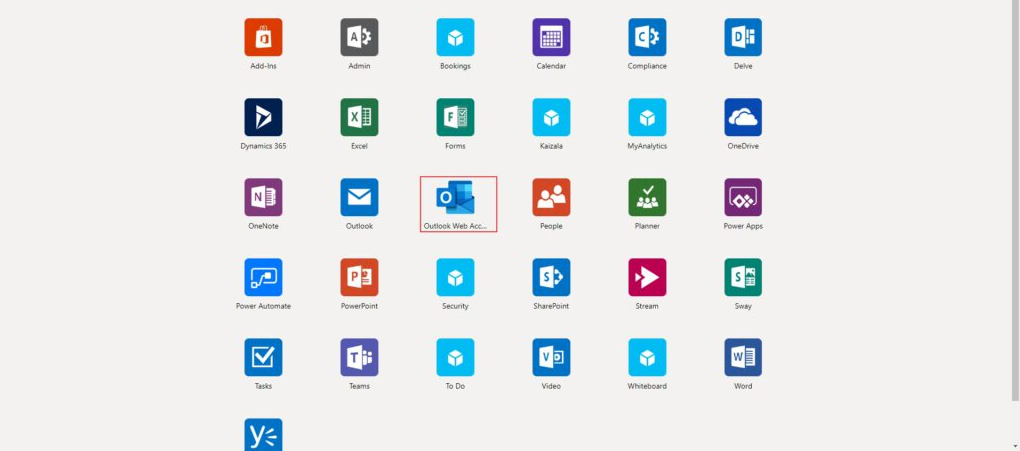
- When you log in on the My Apps page the application will be displayed:
Allowing constrained delegation for the App Proxy
The next step will be allowing the Application Proxy to request kerberos tickets in order to authenticate to the Exchange Server on behalf of the user.
- Log on to your Domain Controller and open Active Directory Users and Computers
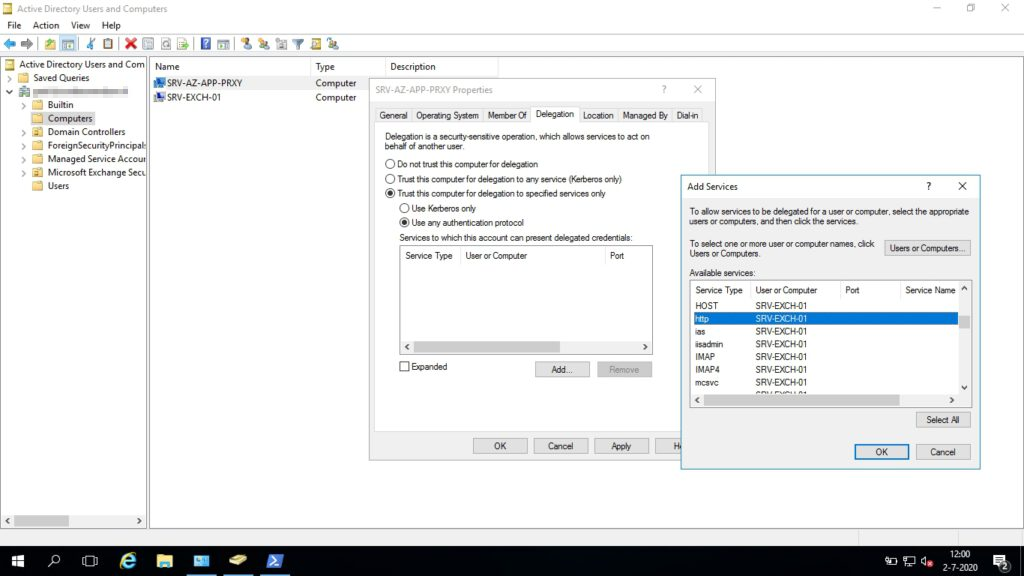
- Find the Azure AD App Proxy server’s computer object and go to the Delegation tab
- Select Trust this computer for delegation to specified services only and Use any authentication protocol
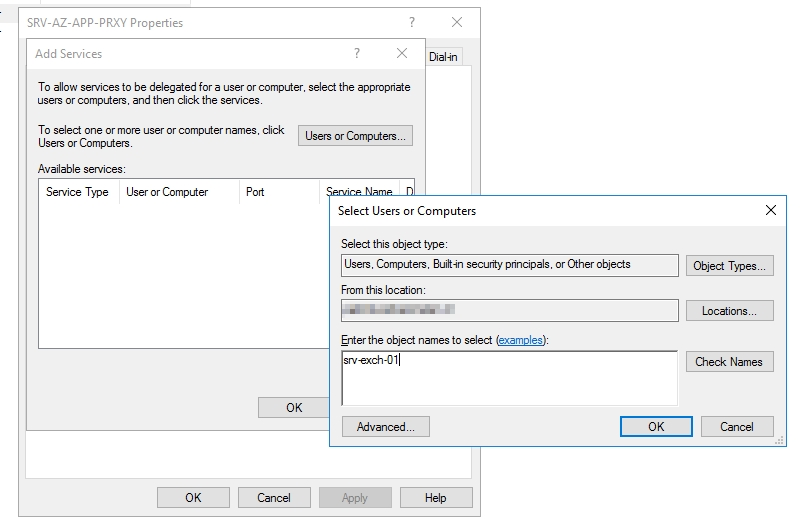
- Select Add… and type in your Exchange Server’s name, then press OK
- Then select the Service type “http” and press OK twice
- You now have given your Azure App Proxy server permissions to request Kerberos tickets on behalf of the user and send them to the Exchange Server for HTTP requests.
Enabling Windows Authentication for Exchange
- By default Exchange works with Forms-Based Authentication in order to display a user friendly page when you access Outlook Web App.
- To let the Azure AD App Proxy pass trough the credentials using Kerberos we will need to enable Windows Authentication.
- Open the Exchange Management Shell and enter the following 2 commands, the second one will be for the Exchange Control Panel. Because the Exchange Control Panel is part of Outlook Web App you will need to allign the 2.
get-owavirtualdirectory | set-owavirtualdirectory -windowsauthentication $trueget-ecpvirtualdirectory | set-ecpvirtualdirectory -windowsauthentication $true
- To process the changes for Exchange you will need to recycle the IIS App Pools for Outlook Web App and Exchange Control Panel, to do this you will need to open the IIS Management console and select Application Pools, then Recycle.. and recycle both the Outlook Web App and Exchange Control Panel app pools

Adding Single-Sign On to the Outlook Web App Enterprise App
- The last thing you will need to do is configure Single-Sign On to be automatically signed in when you access Outlook Web App through the App Proxy.
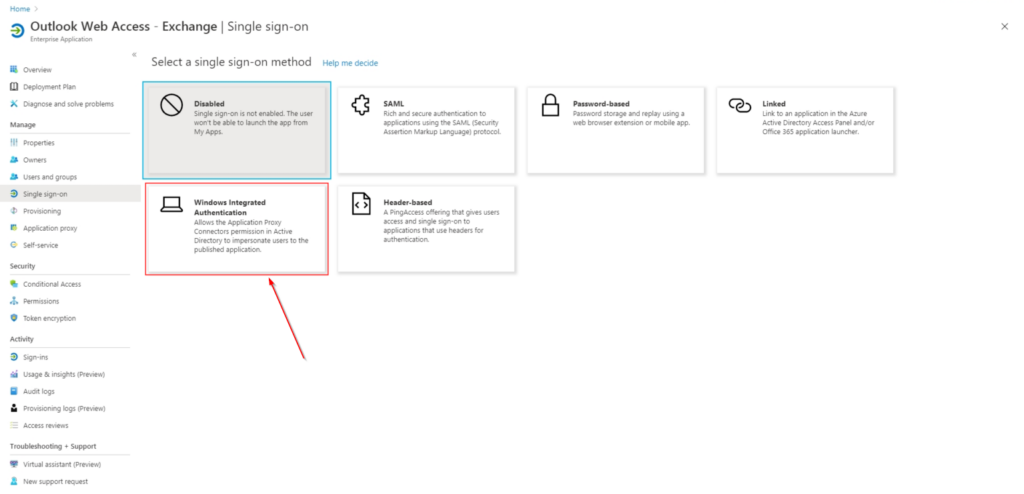
- Go to the Single-Sign On page in your “Outlook Web App” Enterprise app and select Windows Authentication
- Fill in the SPN in the following format service/servername so in this case it’s http/servername (1) and select User Principal Name (2)
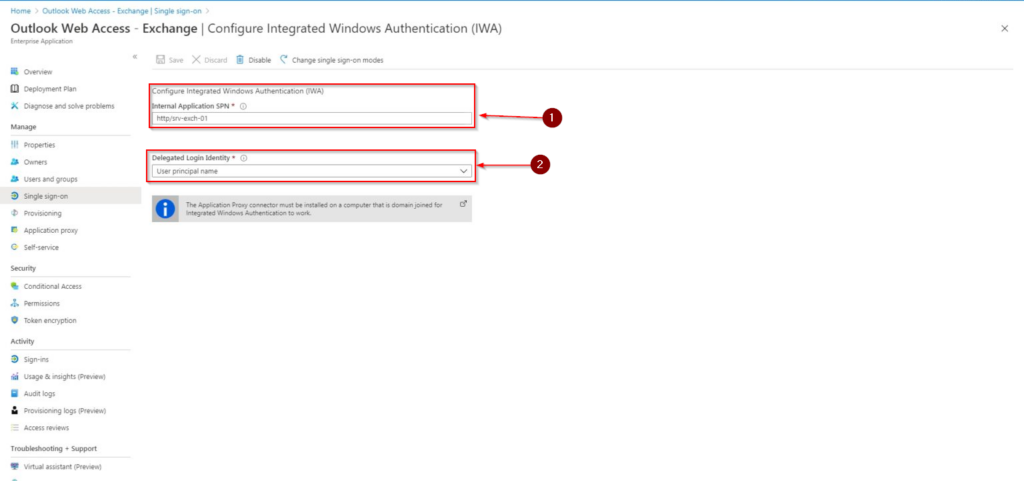
- The Application Proxy will now know that it needs to request a Kerberos ticket for HTTP requests send to the Exchange Server.
- And that´s it. You can now use MFA for accessing Outlook Web App even on-prem!

Hi
Thanks we have a DAG 2 Exchange servers. I am stuck at the SPN part. Can you help?
Thanks for the very good manual. Everything is ok now with the application proxy. Only one question. The old owa link is still working without mfa. The new link is webmail.domain.com/owa and the old link mail.domain.com/owa. So I must disable the old one that this url cannot be used anymore. Any advise? The external url in exchange owa settings is still mail.domain.com/owa. The application proxy links to that url and thats working but when I access direct the old link I can login without mfa.